newRPL keyboard overlay version 5
Just an update on the newRPL keypad overlay.
Many mistakes have been made, much has been learned, there has been more progress than retreat. I feel as if I'm getting closer to the end of this process, rather than just further from the beginning of it.
I've incorporated some suggestions in the thread in the overlay. I've also added another label intended to be stuck on the back of the calculator, sized to fit in the shallow recess that has the serial number sticker. This mostly contains the various ON-hold key combinations that may not be used as frequently, but are helpful.
Here's the 5th variation of what I have for your use and entertainment.
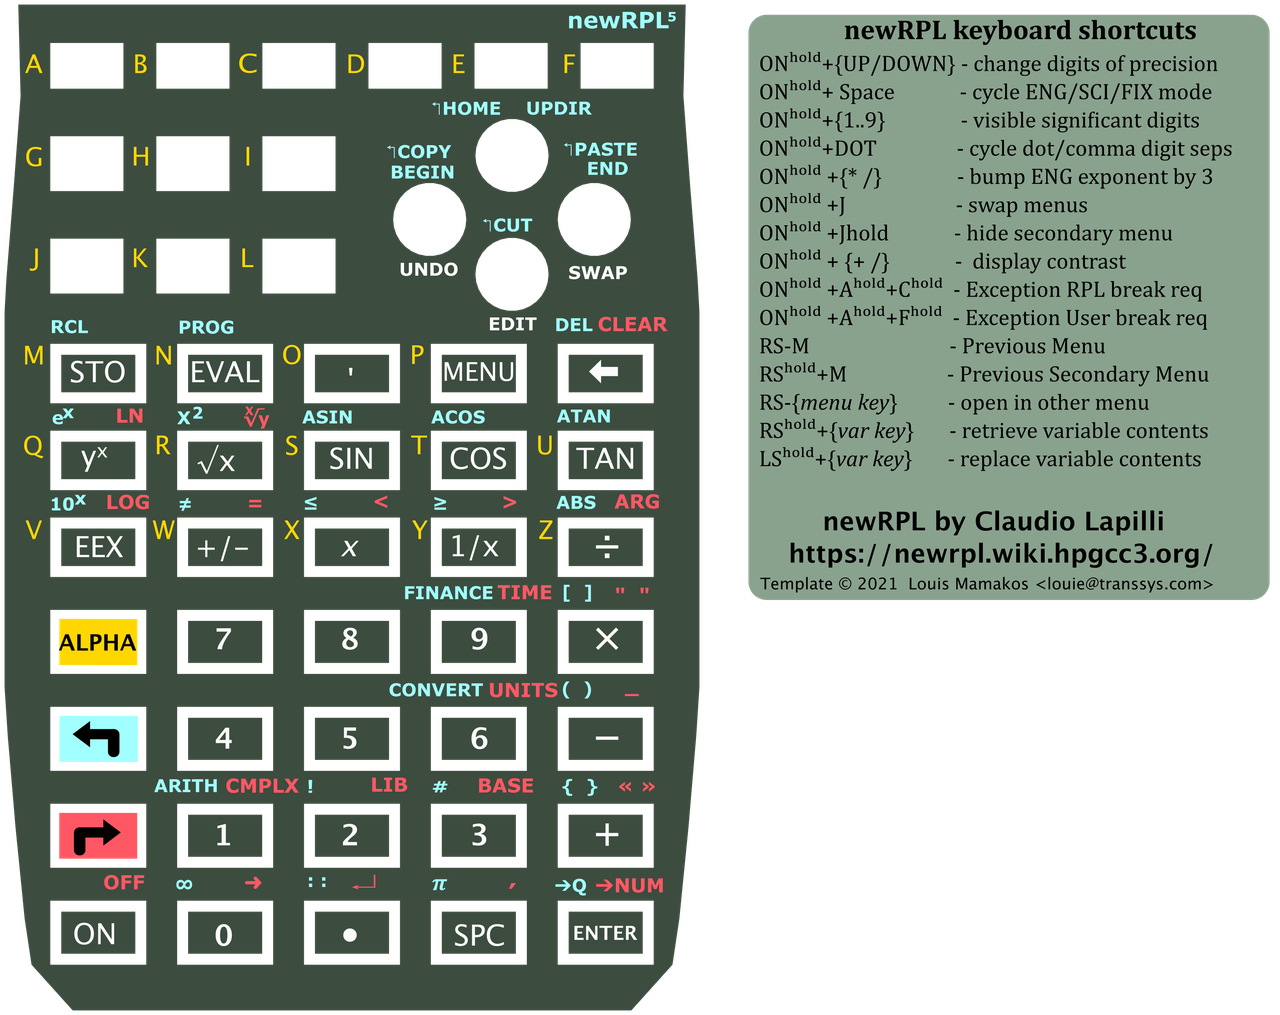
I think that I'm mostly complete with the actual keypad overlay design, though I think I still need to slightly tweak the layout slightly to better center the "M" and "Q" row of keys.
Now what remains is how to best fabricate these.
Up through version 4, I was just printing directly on this "Waterproof Printable Vinyl Sticker Paper for Laser & Inject Printer" product using my Brother HL-L8350CDW color laser printer. This seems to mostly work OK. However I don't think the ink toner sticks really well as maybe ink would. And I notice that when I run it throug the Cricut cutter, the white vinyl shows through near the edges; probably some toner is flaking off during the cutting process.
This product seems to have just about the right degree of adhesion. I was most worried about the small keycap labels, but they don't seem to have shown much propensity to wiggle around while being pressed. Yet, I can still remove those key labels as well as the background overlay without leaving gunky residue behind. (Which is really good since, well, I'm now on version 5 of this..)
What I've been experimenting with now is printing on that vinyl product and then applying a layer of clear vinyl over top of the printed output before running it through the cutter. My goal here is to improve the mechanical robustness and prevent wear of the printed toner, either through repeated finger presses or scratching it.
I have had mixed success so far, and more work is needed in this area. First, the application of the clear overlap really improves the visual appearance and readability. I'm certain it will result in wear resistance. The downside is that it is slightly thicker, and I don't know how badly this impairs the user-experience as you bang away on the keys.
My first attempt at this was mostly a fail; the product I used had bad adhesion to the printed vinyl I was sticking it to. My wife tells me that it was probably "repositionable vinyl" - who knew this was a thing? I was mostly selecting based on the thinness of the product. And the cutting pressure was not strong enough; that outer layer got cut, but not deeply enough to cut the printable vinyl below the clear outer layer I applied.
My second attempt for a clear covering is with a different product "VViViD Clear Self-Adhesive Lamination Vinyl Roll for Die-Cutters and Vinyl Plotters" which seems to have promise. It definitely seems stickier, and trying to get it smoothly unrolled and attached is a bit of a juggling act, it seems. On my first try, it mostly got put down OK, but this time the cuting pressure was too high, and a bunch/most of the key labels got knocked loose and dragged around. So something in between... Regardless, I managed to get a few key labels as well as the background overlay and applied to my HP 39gs.
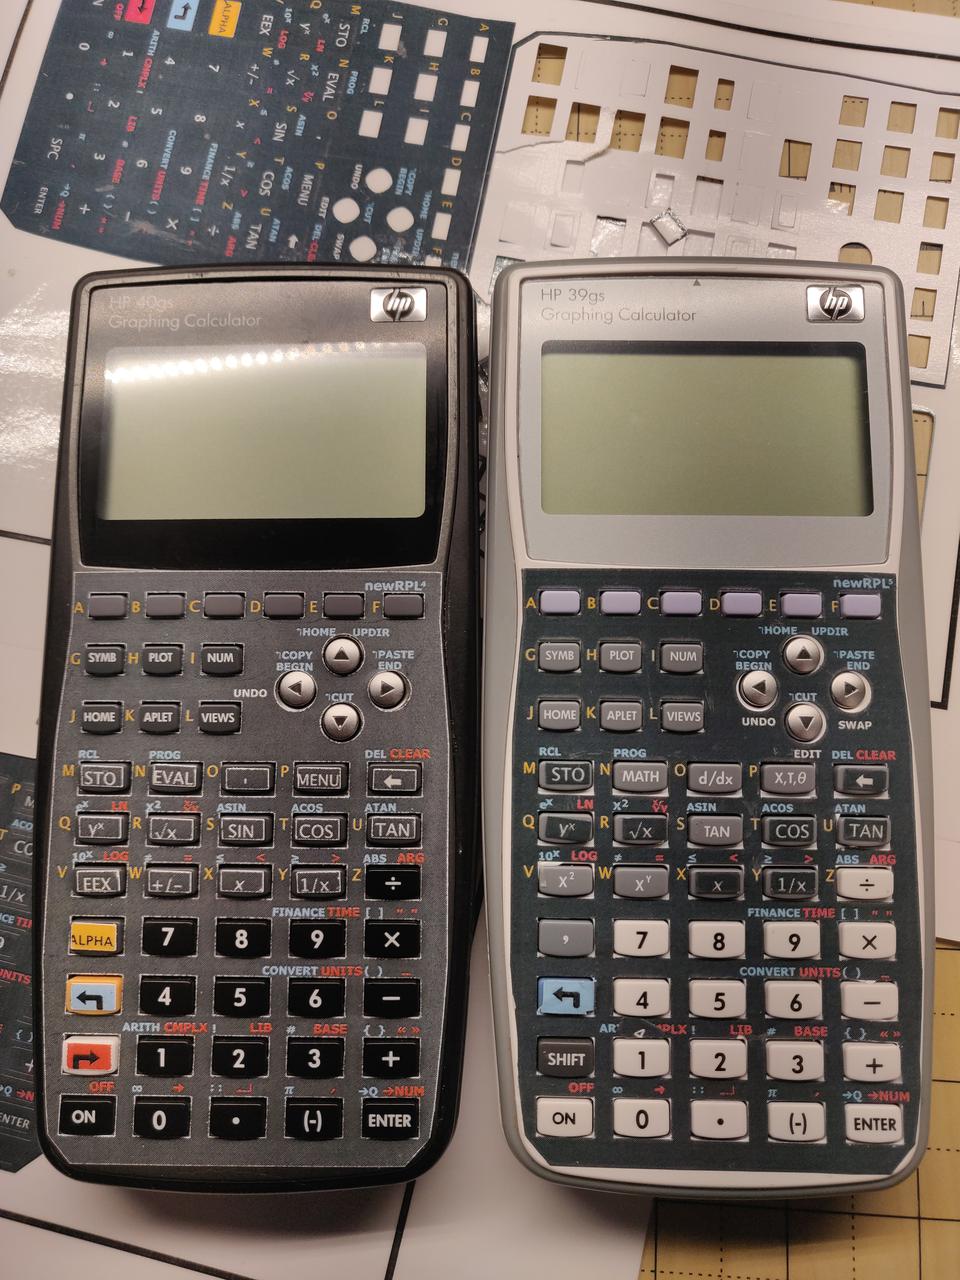
Here's a comparison of how the two variations compare. The black HP 40gs on the left is just the "raw" printable vinyl, while the HP 39gs on the right has the clear vinyl layer applied over the printable vinyl. The latter is missing most of the keyboard buttons as many of those labels fell victim to the bad cutting pressure.
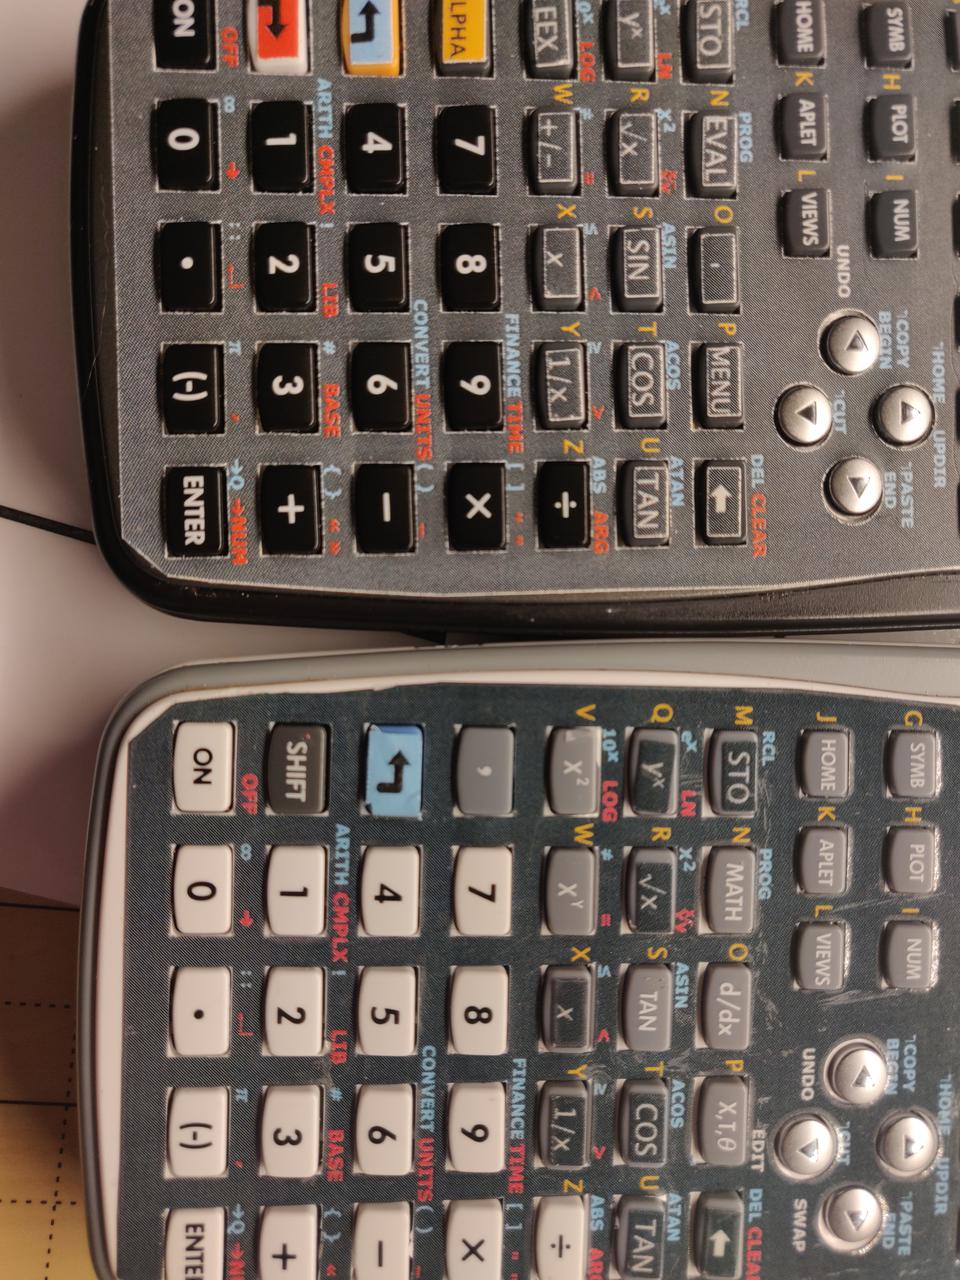
Here they are, side-by-side and more close-up to compare. The difference to the naked eye in person is pretty plain. I also need to do a better job of more cleanly applying the clear vinyl material to avoid some of the smudging, or whatever you call that..
If you'd like to reproduce this project, you can grab the PNG file above. If you have a Cricut cutting machine, you could try to use the shared project on Cricut Design Space to cut it on your machine.
Comments